- Data Recovery
- Data Recovery for PC
- Data Recovery for Android
- Data Recovery for iPhone/iPad
- Unlock For Android
- Unlock for iPhone/iPad
- Android System Repair
- iPhone/iPad System Repair
Updated By Tom On Nov 25, 2022, 7:22 pm
Android data recovery (Ultdata) can help you quickly and safely recover data on Android devices, such as deleted photos, videos, messages, address books, etc. Today, we will introduce how to use UltData - Android to easily recover lost Android data.
Step 1: Connect your Android device
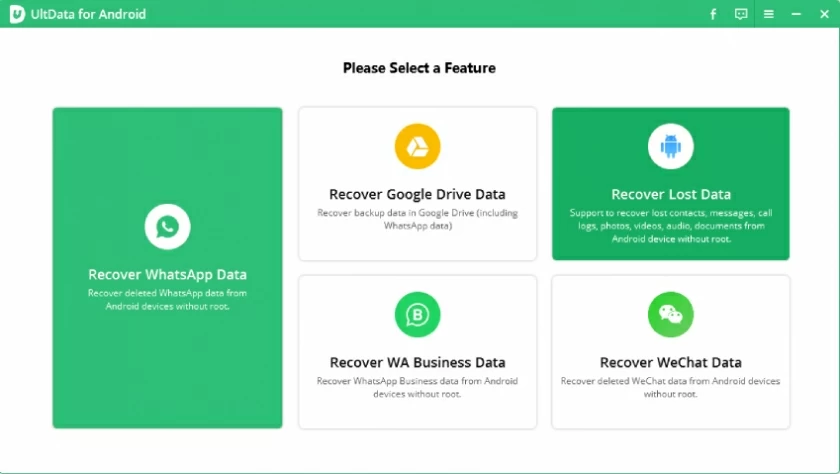
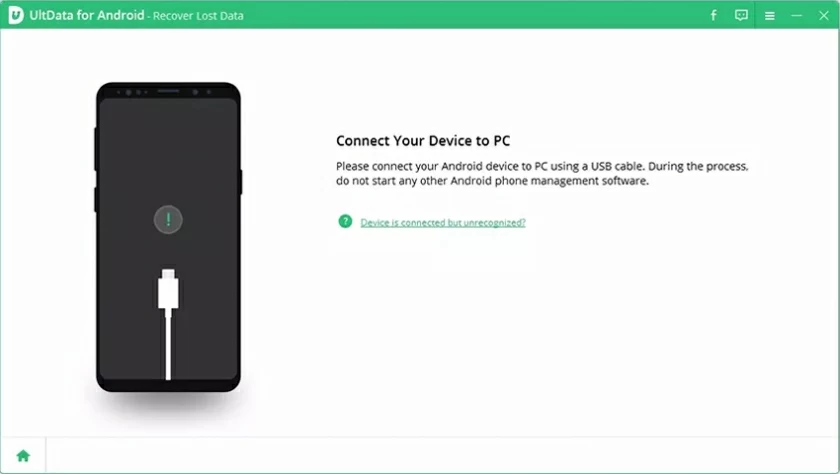
Download and install UltData-Android on your PC. Select "Recover Lost Data". Then connect your Android device with an OEM USB cable.
Step 2: Enable USB debugging function
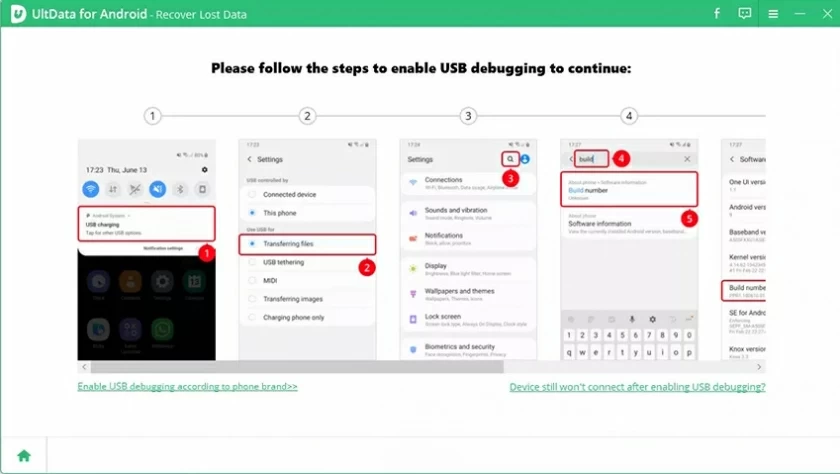
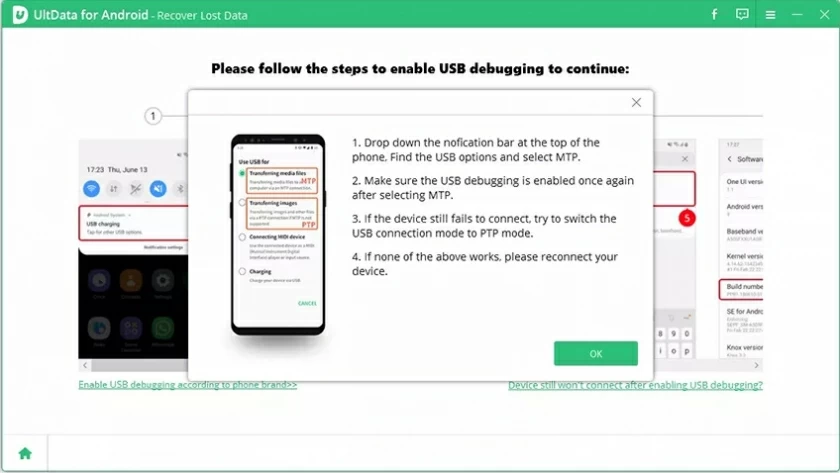
Enable USB debugging on your Android phone. Please refer to the figure below to access the USB debugging function. On the mobile phone, click "USB Charging" in the taskbar on your phone, and switch the option to "Transferring files". Return to settings, search for "Build" and select "Build number", then click 7 or more times according to your device.
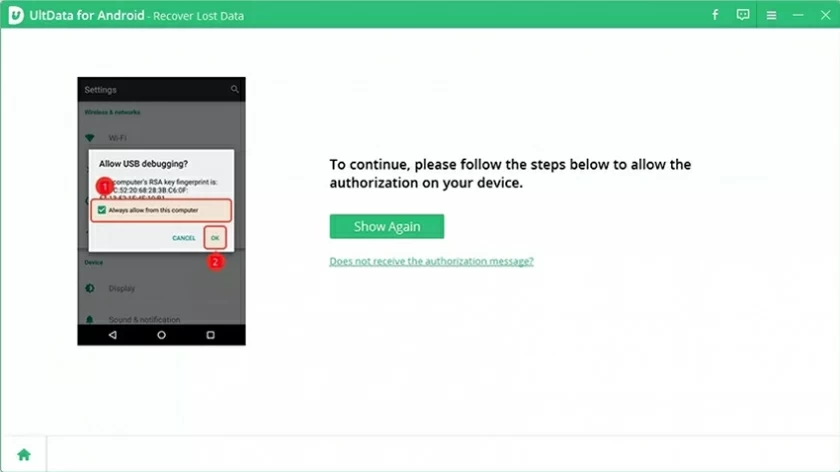
After USB debugging is enabled, you need to enable the debugging permission on the device. When permissions are enabled, a window will pop up on your device asking you if you allow authorization. Click "OK". If the window does not pop up, click the "Show again" button.
Step 3: Scan your device
After the connection is completed, click "Next", and the data recovery software will automatically scan the deleted photos on your device.
Tip: Before scanning, the system will ask you if you are allowed to install the connector application on your device. Please rest assured that the program is completely safe and free.
Step 4: Preview and restore lost photos
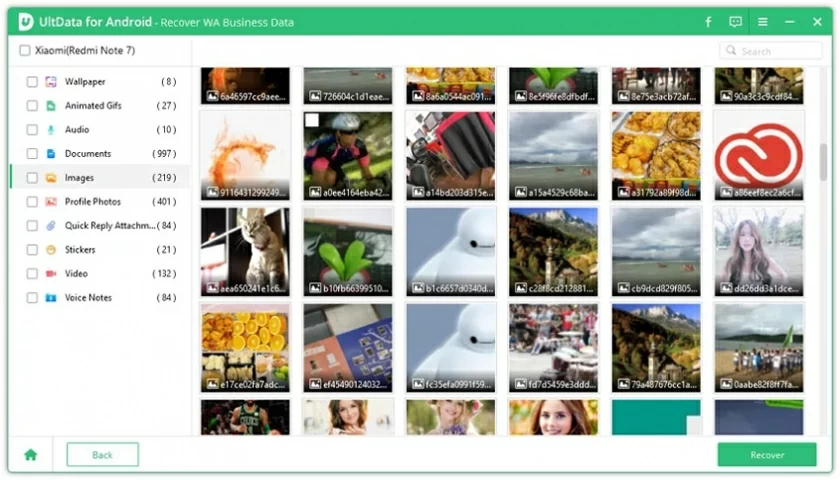
All images will be displayed after scanning, and you can preview the photos before restoring them. Then select the photos you want to restore and click "Restore".
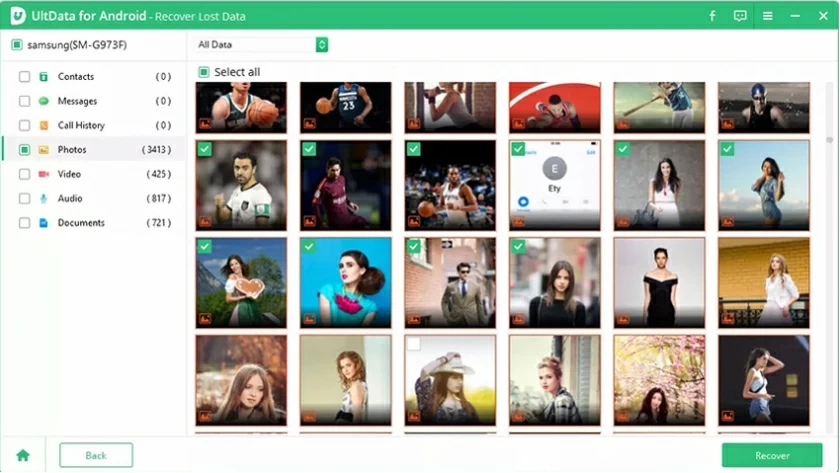
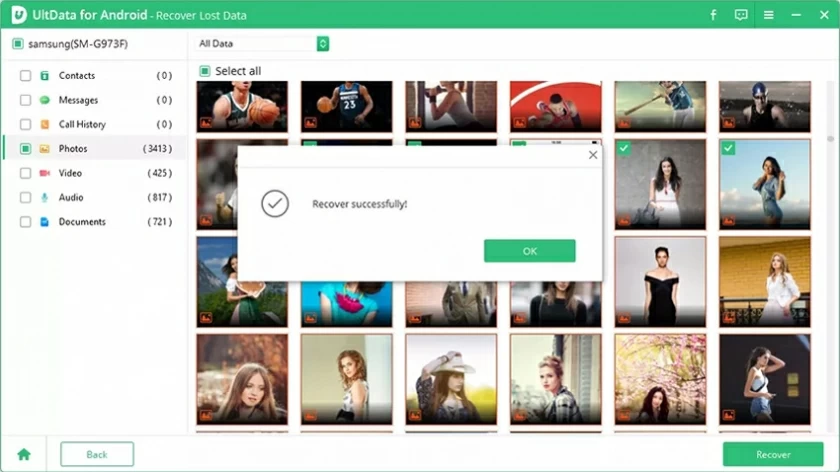
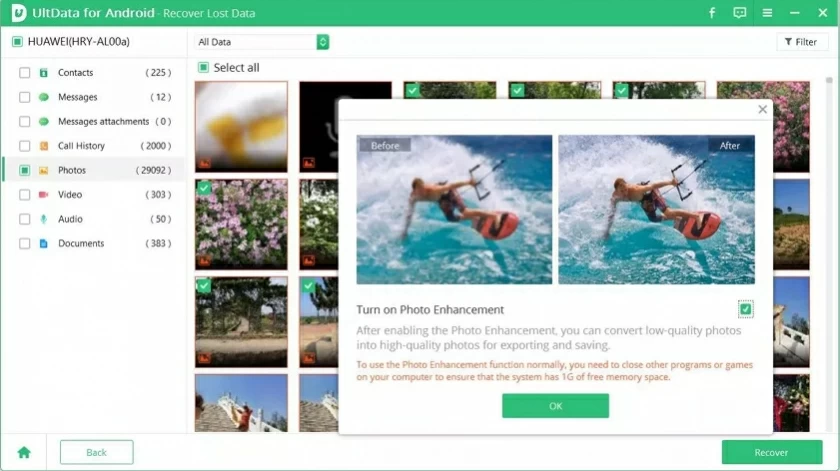
Photo enhancement: After clicking the "Restore" button, select the "Open Photo Enhancement" , which will automatically increase the resolution of the restored image.
Step 1: Connect your Android device
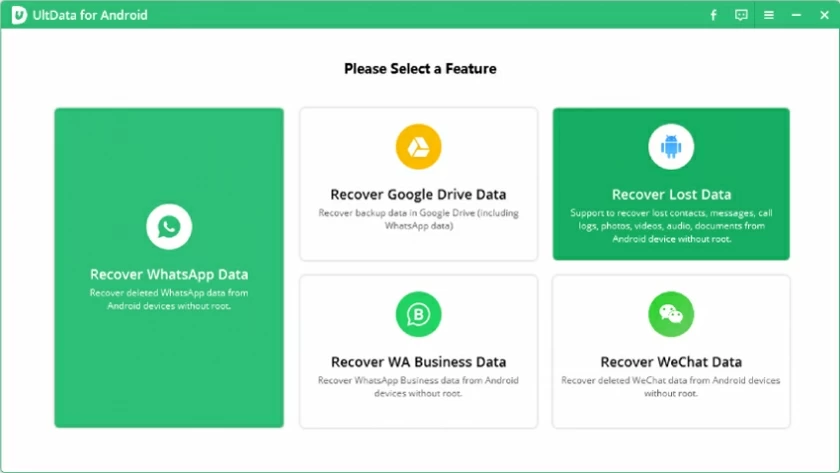
Install and start UltData - Android Data Recovery, and select "Recover Lost Data" on the main interface. Connect your computer and Android device with a USB cable.
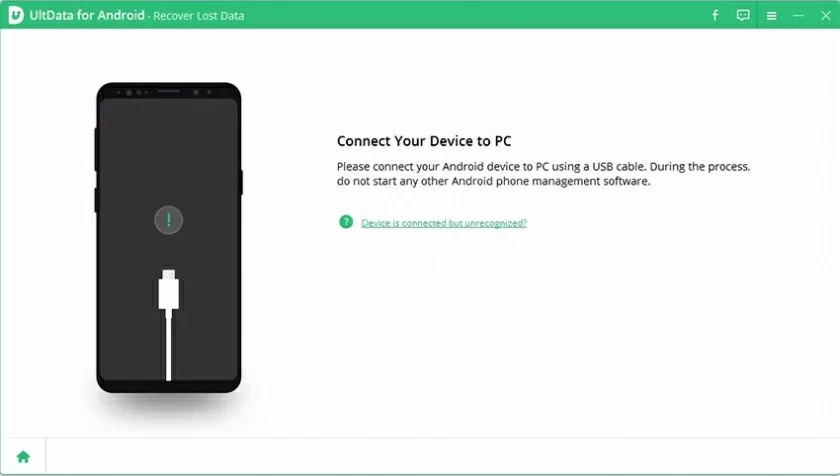
Step 2: Enable USB debugging function
Enable USB debugging on your Android phone. Please refer to the figure below to access the USB debugging function. On the mobile phone, click "USB Charging" in the taskbar on your phone, and switch the option to "Transferring files". Return to settings, search for "Build" and select "Build number", then click 7 or more times according to your device.
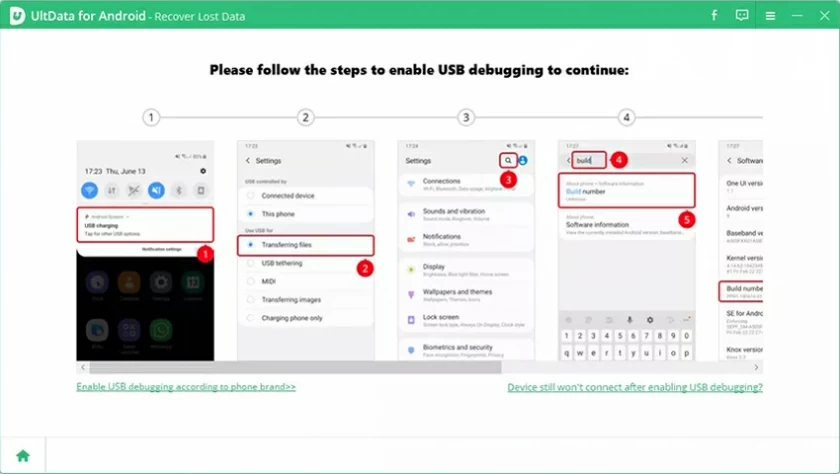
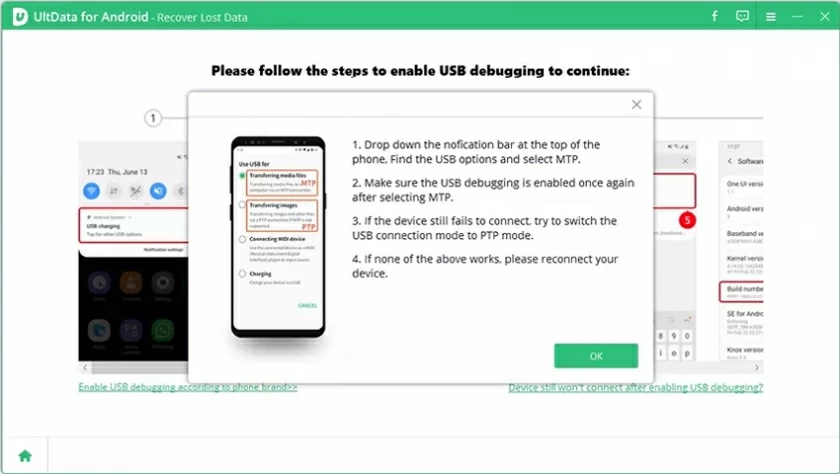
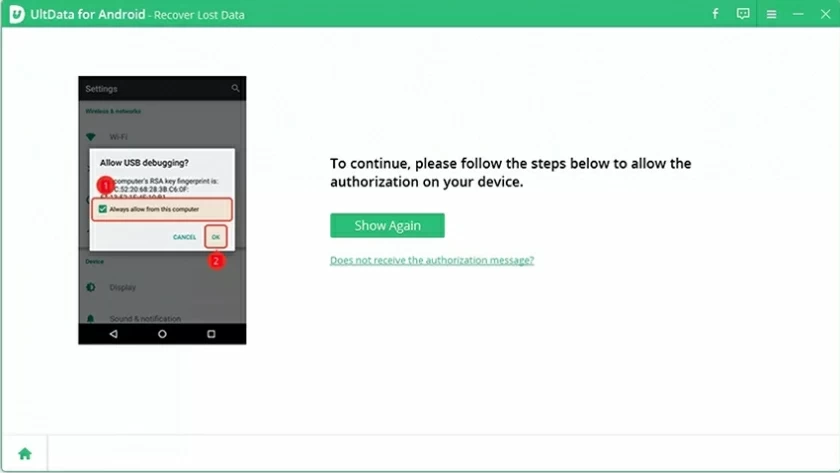
After USB debugging is enabled, you need to enable the debugging permission on the device. When permissions are enabled, a window will pop up on your device asking you if you allow authorization. Click "OK". If the window does not pop up, click the "Show again" button.
Step 3: Start scanning
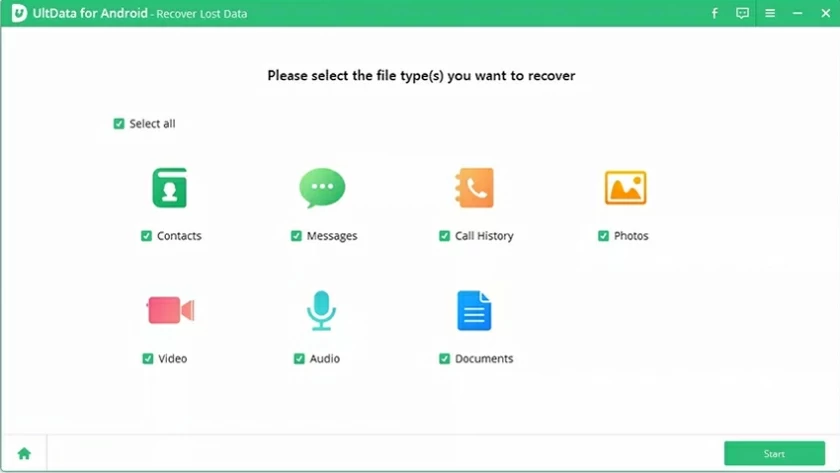
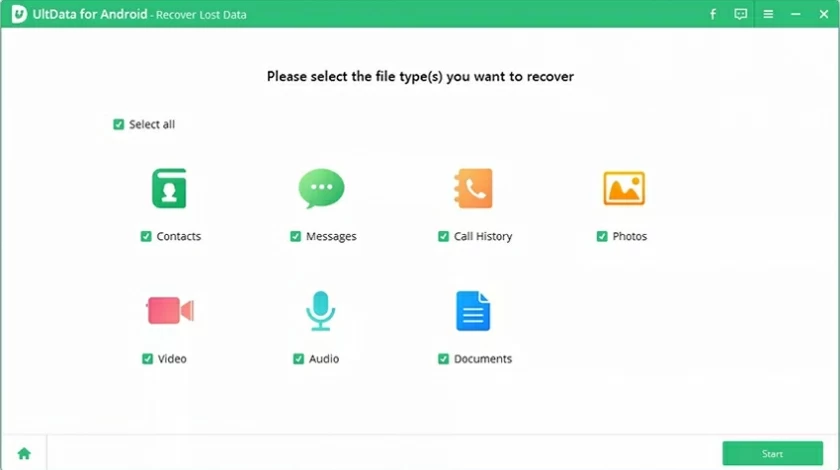
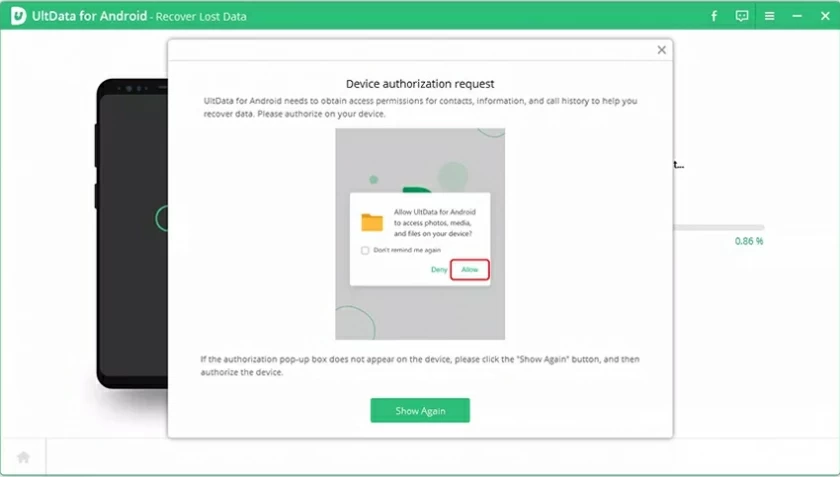
After successfully connecting the Android device, it will display the following screen. Please select the file type you want to restore and click the "Start" button. To scan your device, you need to install the connector application first. Please be assured that the program is safe and free. Please click the "Allow" button on your device to continue. Note: Do not operate the phone during scanning.
Step 4: Preview and recover the lost data
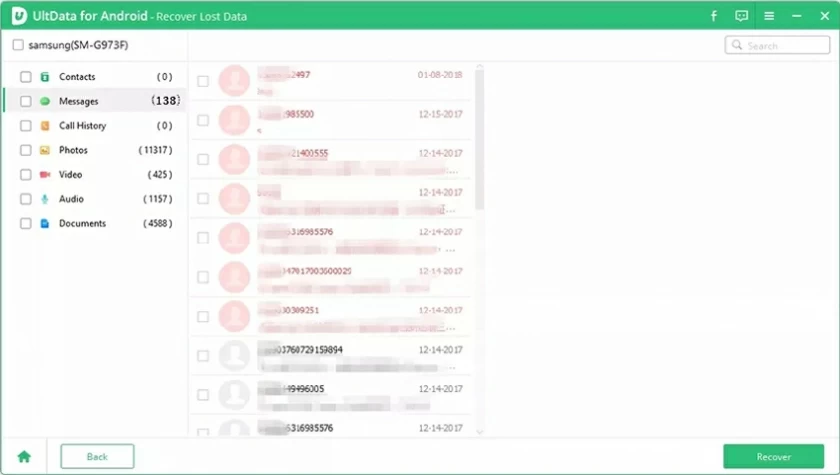
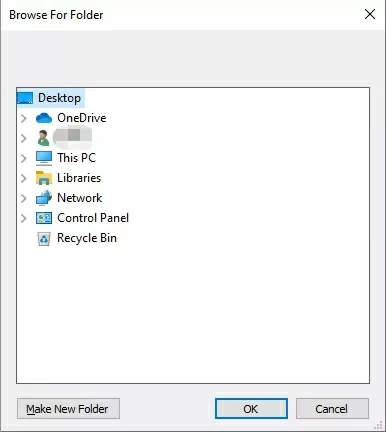
After scanning, all data will be displayed. Select the data to be restored and click "Restore" to save it to the desired location.
Step 1: Connect your Android device
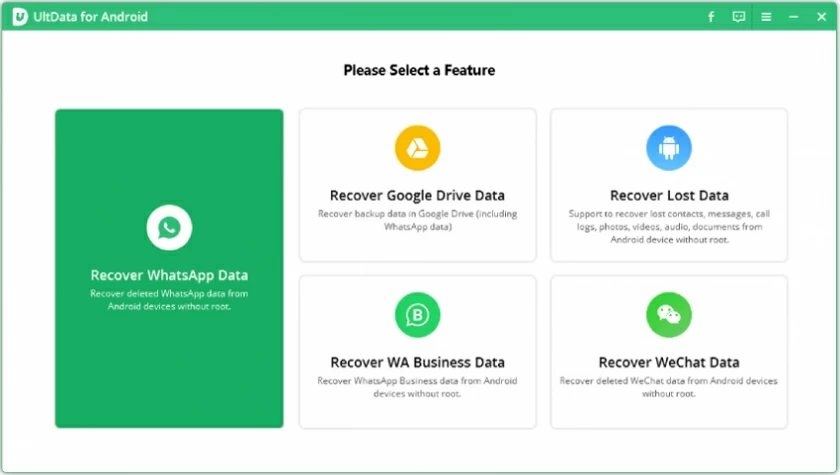
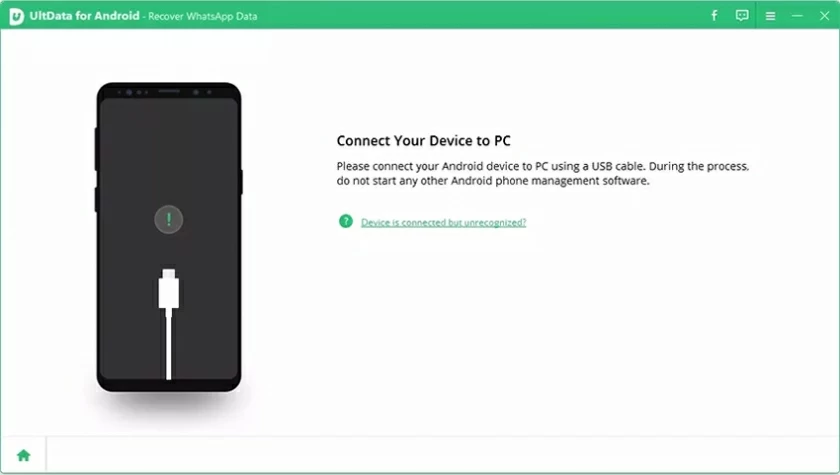
Install and start UltData - Android Data Recovery, and select "recover whataspp data" on the main interface. Connect your computer and Android device with a USB cable.
Step 2: Enable USB debugging function
Enable USB debugging on your Android phone. Please refer to the figure below to access the USB debugging function. On the mobile phone, click "USB Charging" in the taskbar on your phone, and switch the option to "Transferring files". Return to settings, search for "Build" and select "Build number", then click 7 or more times according to your device.
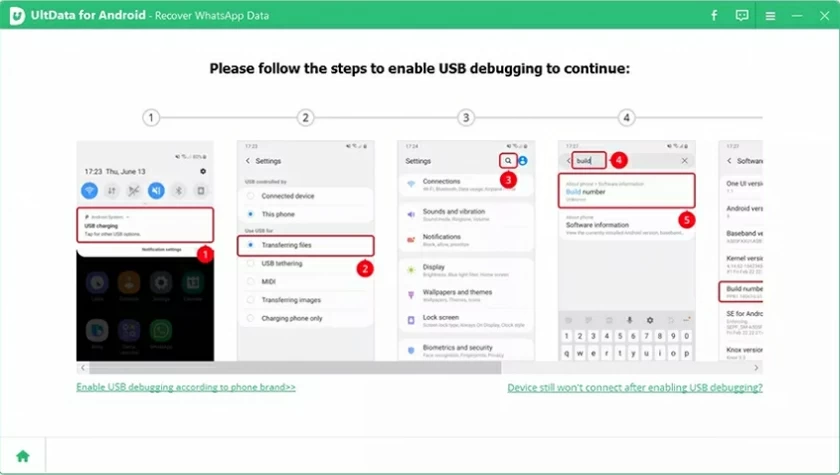
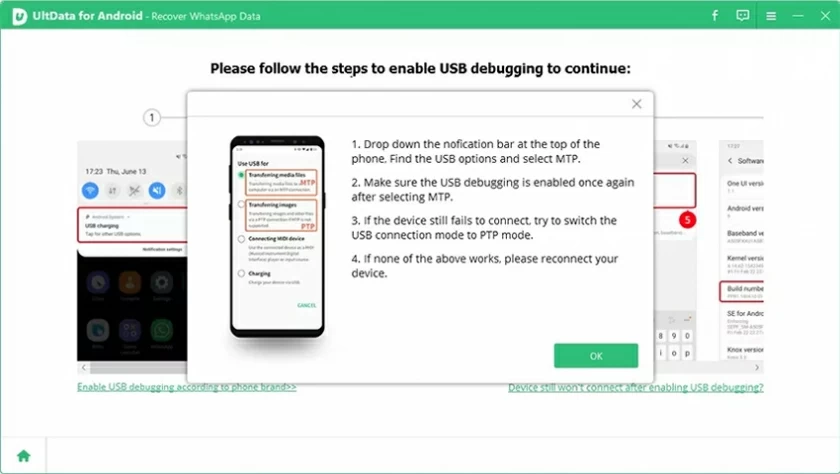
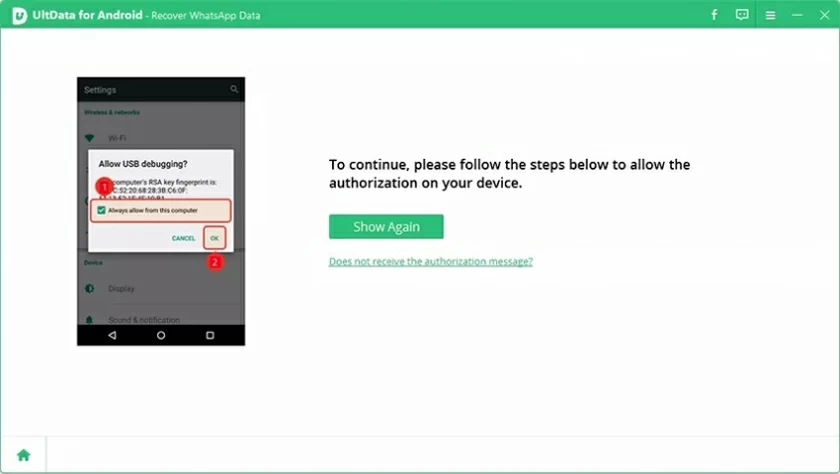
After USB debugging is enabled, you need to enable the debugging permission on the device. When permissions are enabled, a window will pop up on your device asking you if you allow authorization. Click "OK". If the window does not pop up, click the "Show again" button.
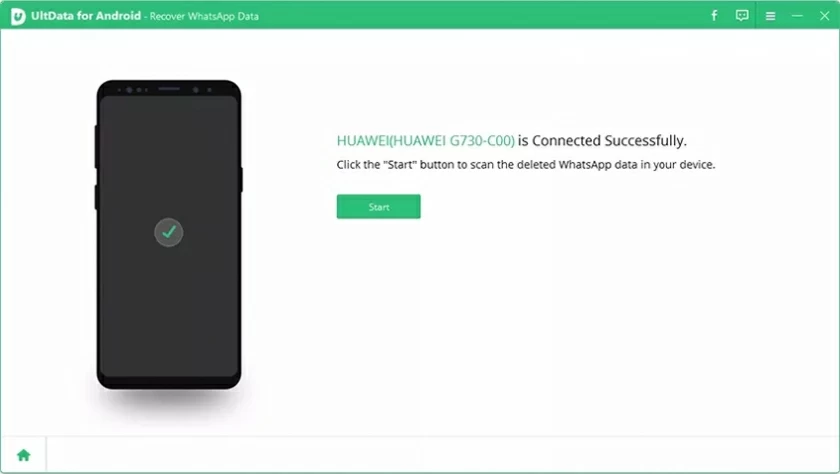
Step 3: Scan whatsapp data
Once the program detects your Android device, it displays the following screen. Click the "Start" button to find the deleted Whatsapp data in your device.
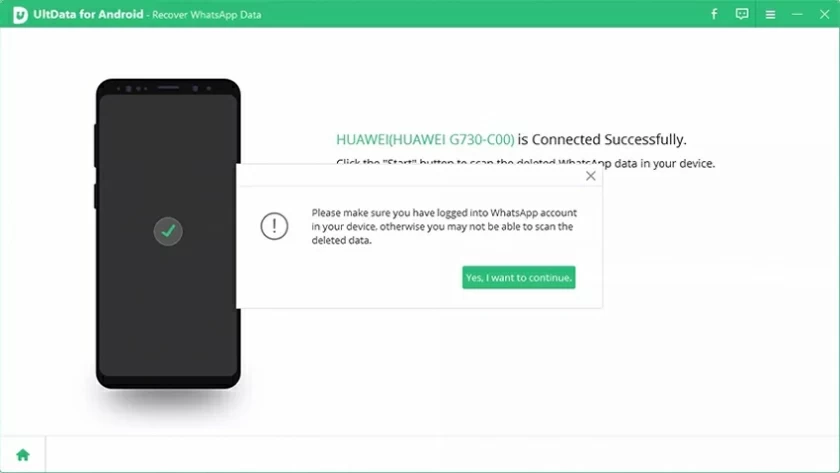
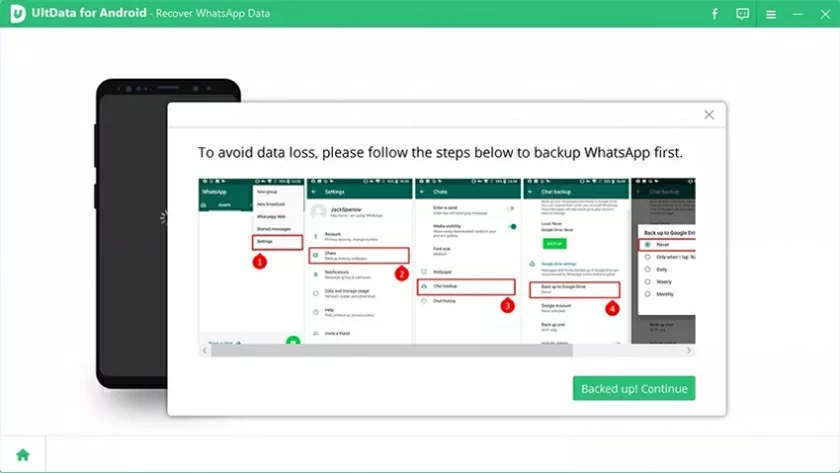
You need to log in to WhatsApp account, and click "Continue" after logging in. To avoid data loss, you can click the "Backup" button, and then the data recovery software will start scanning WhatsApp data.
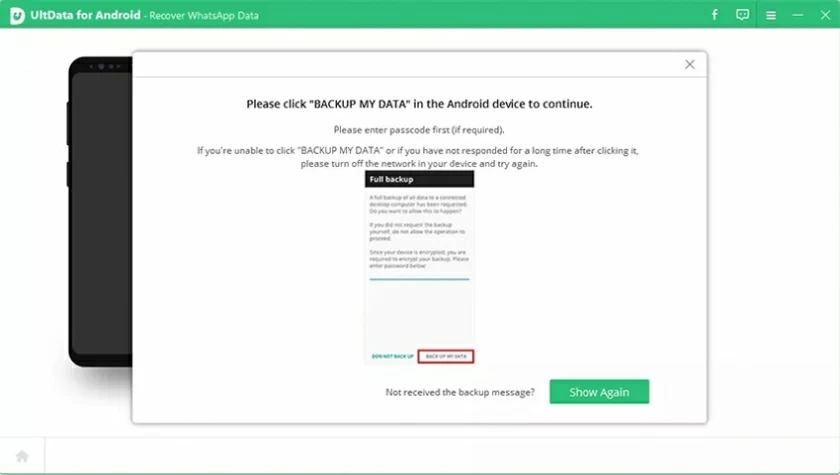
After a few minutes, click the "Back up my data" button. If the device does not pop up the authorization window, click the "Show again" button.
Step 4: Preview and restore WhatsApp data
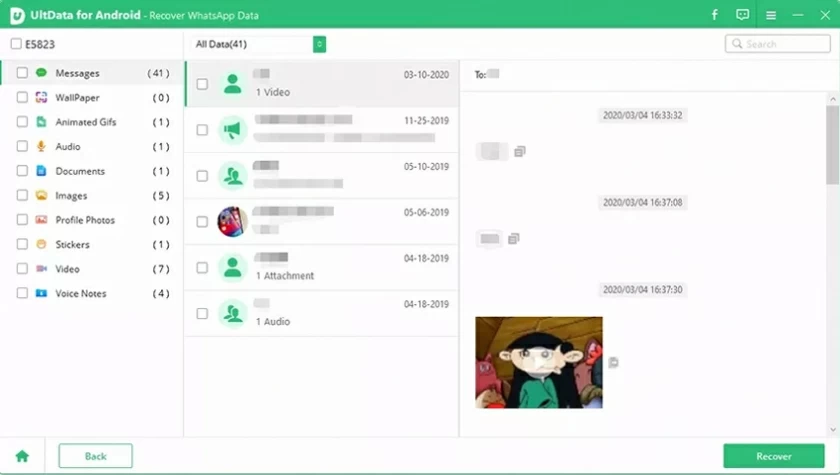
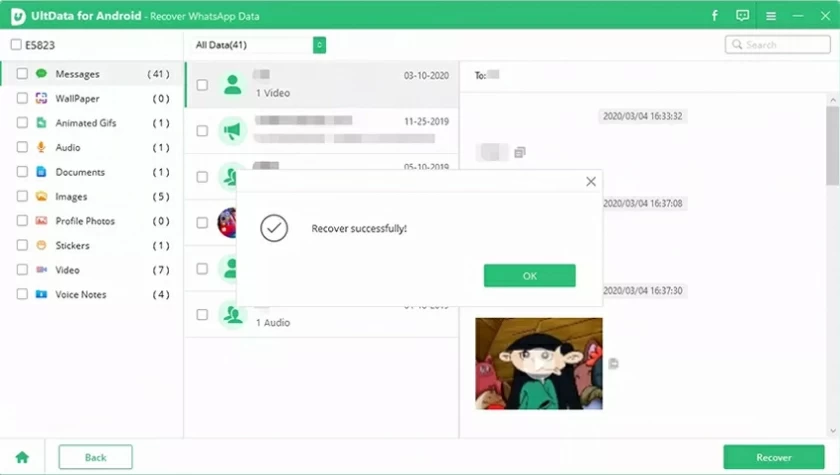
After scanning, all data will be displayed. Select the data to be restored and click "Restore" to save it to the desired location.
Step 1: Connect your Android device
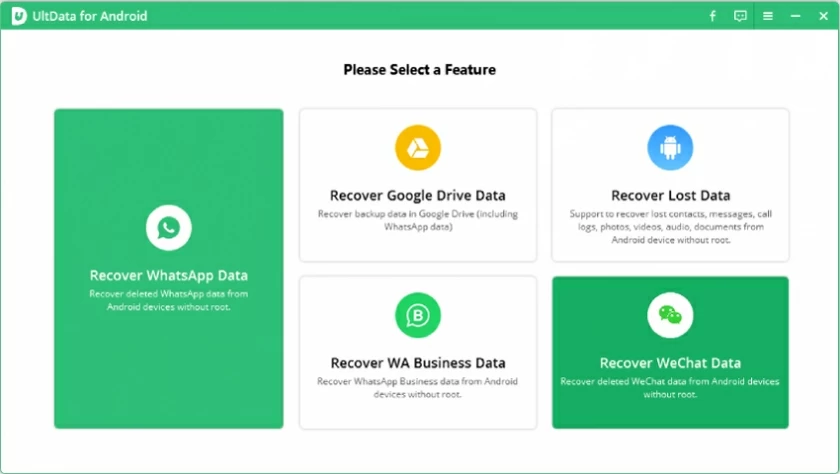
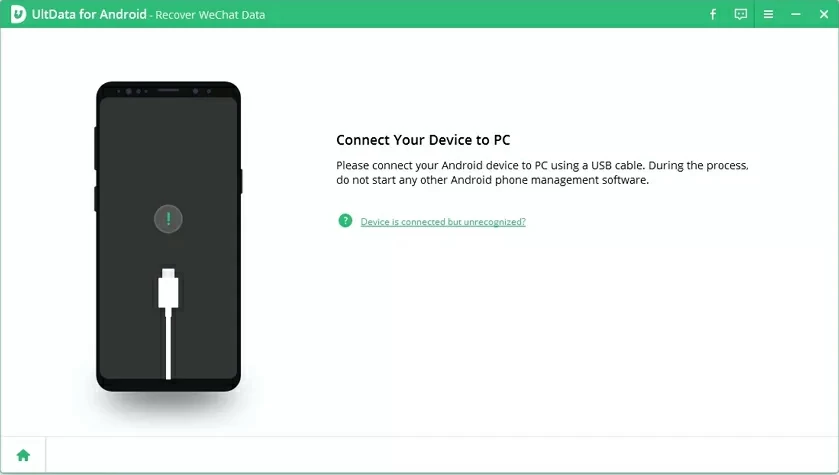
Install and start UltData - Android Data Recovery, and select "Recover WeChat data" on the main interface. Connect your computer and Android device with a USB cable.
Step 2: Enable USB debugging function
Enable USB debugging on your Android phone. Please refer to the figure below to access the USB debugging function. On the mobile phone, click "USB Charging" in the taskbar on your phone, and switch the option to "Transferring files". Return to settings, search for "Build" and select "Build number", then click 7 or more times according to your device.
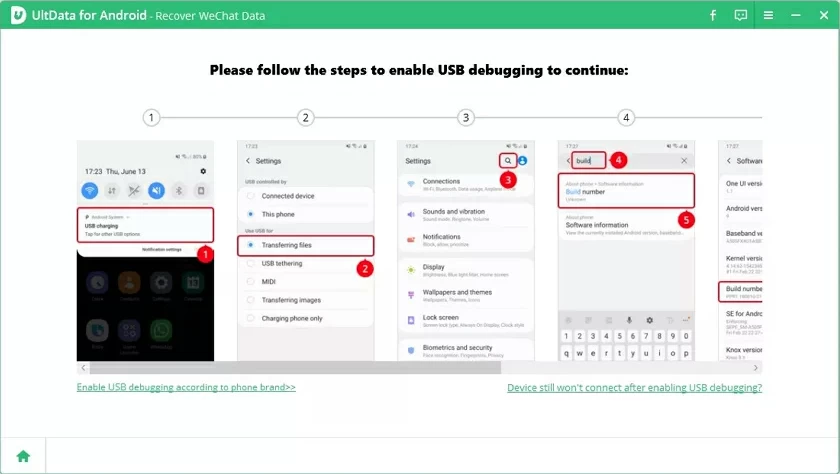
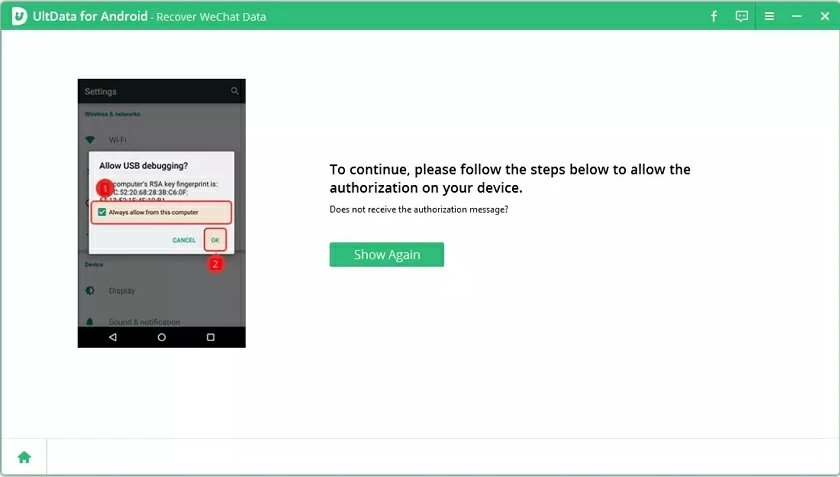
After USB debugging is enabled, you need to enable the debugging permission on the device. When permissions are enabled, a window will pop up on your device asking you if you allow authorization. Click "OK". If the window does not pop up, click the "Show again" button.
Step 3: Start scanning
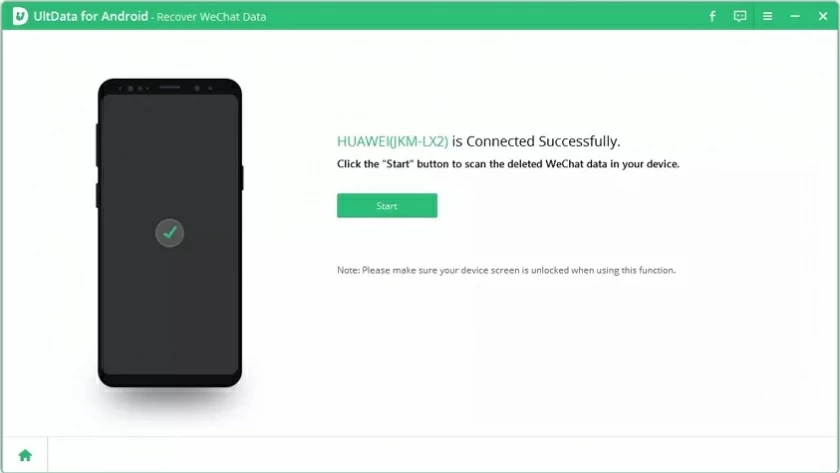
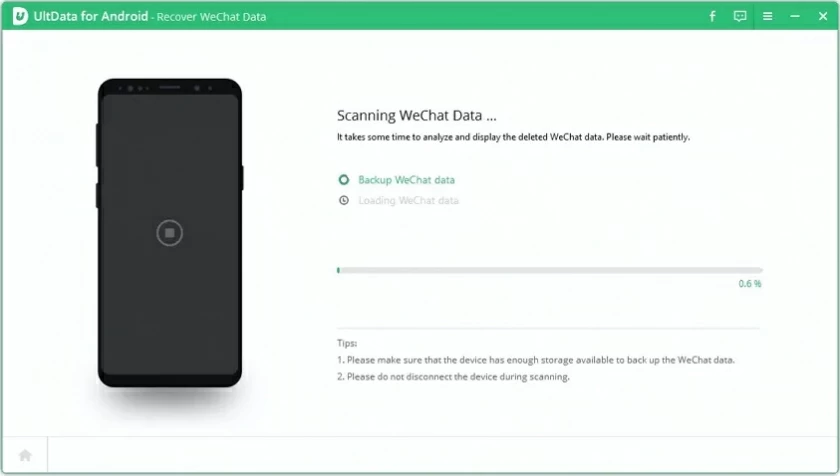
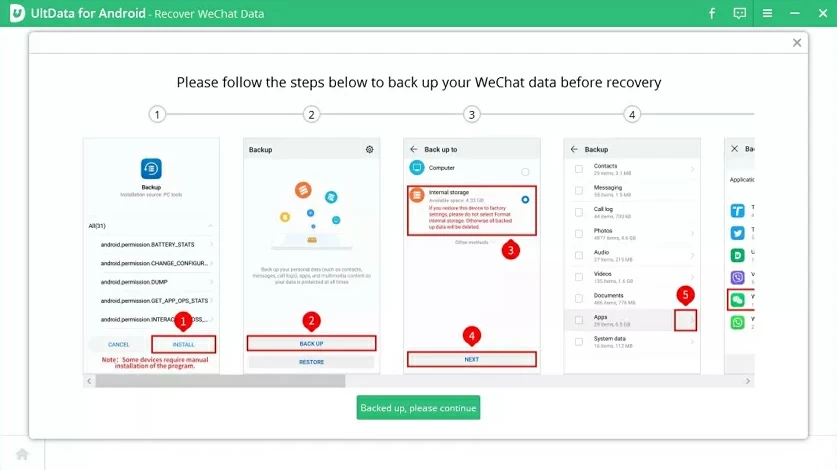
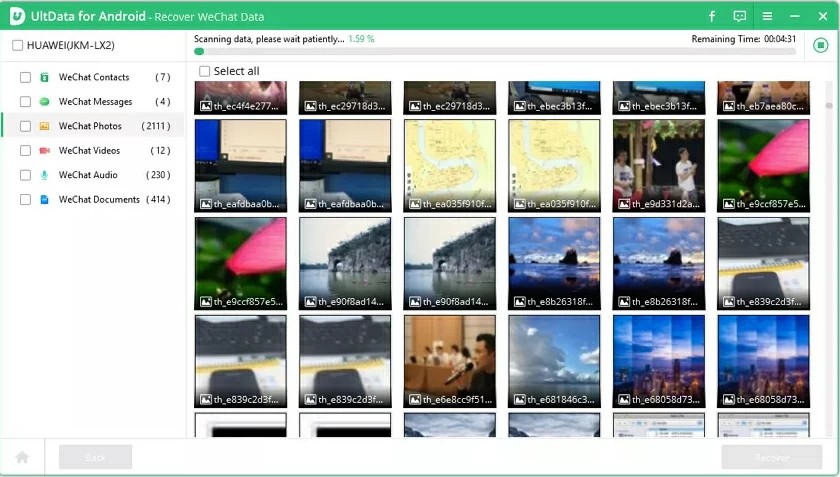
After successfully connecting the Android device, it will display the following screen. Please select the file type you want to restore and click the "Start" button. To scan your device, you need to install the connector application first. Please be assured that the program is safe and free. Please click the "Allow" button on your device to continue. Note: Do not operate the phone during scanning. During scanning, please backup WeChat data as shown below.
Step 4: Preview and recover the lost data
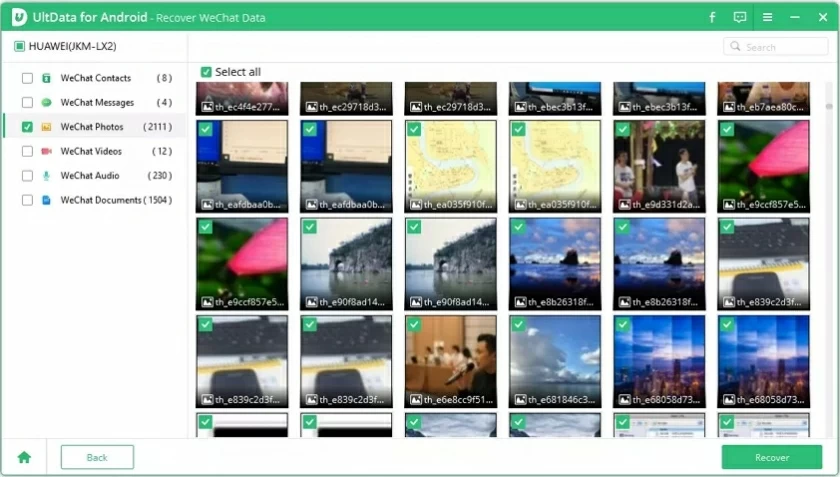
After scanning, all WeChat data will be displayed. Select the data to be restored and click "Restore" to save it to the desired location.
Step 1: Connect your Android device
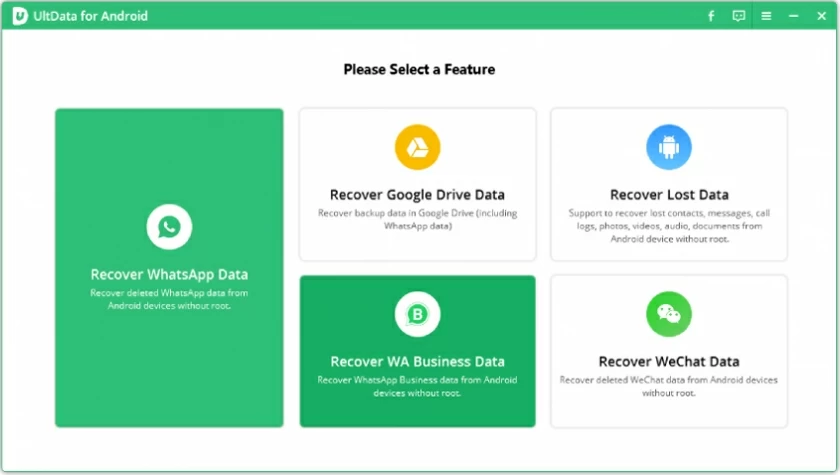
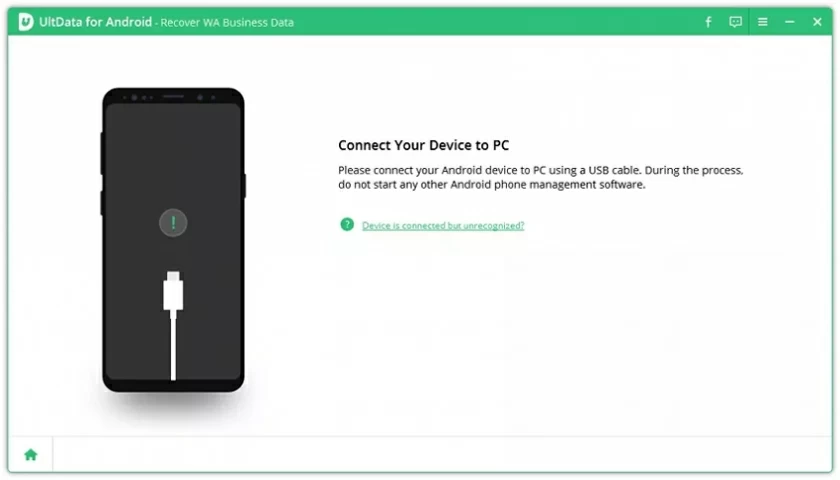
Install and start UltData - Android Data Recovery, and select "Recover WhatsApp business data" on the main interface. Connect your computer and Android device with a USB cable.
Step 2: Enable USB debugging function
Enable USB debugging on your Android phone. Please refer to the figure below to access the USB debugging function. On the mobile phone, click "USB Charging" in the taskbar on your phone, and switch the option to "Transferring files". Return to settings, search for "Build" and select "Build number", then click 7 or more times according to your device.
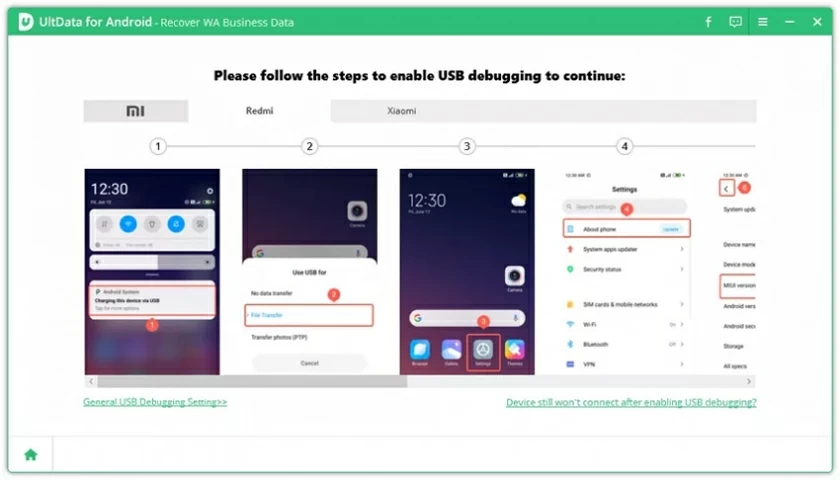
After USB debugging is enabled, you need to enable the debugging permission on the device. When permissions are enabled, a window will pop up on your device asking you if you allow authorization. Click "OK". If the window does not pop up, click the "Show again" button.
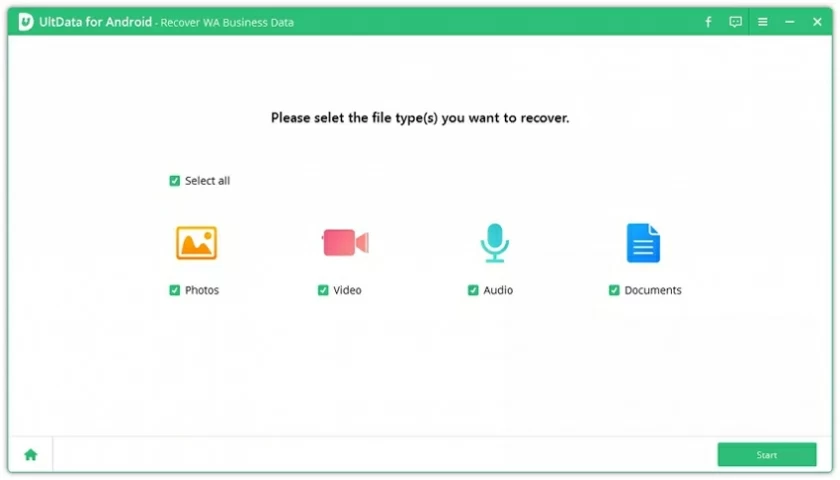
Step 3: Select the file type and start scanning
After successfully connecting the Android device, it will display the following screen. Please select the file type you want to restore and click the "Start" button to scan your device.
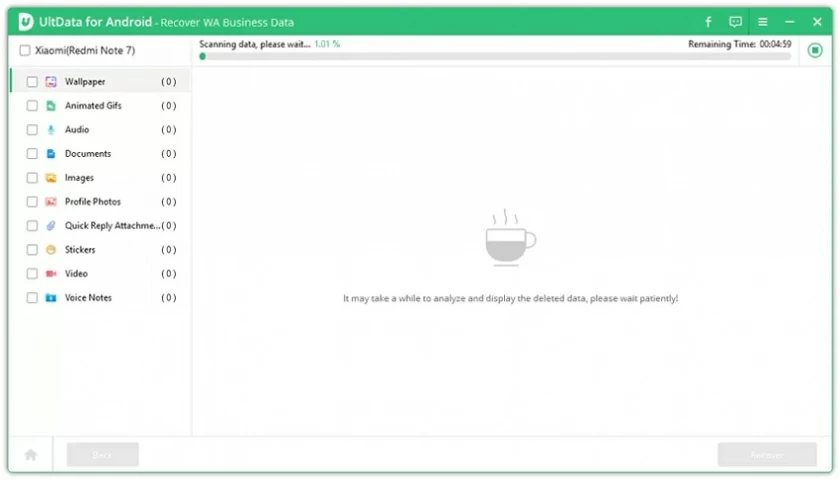
Step 4: Preview and recover the lost data
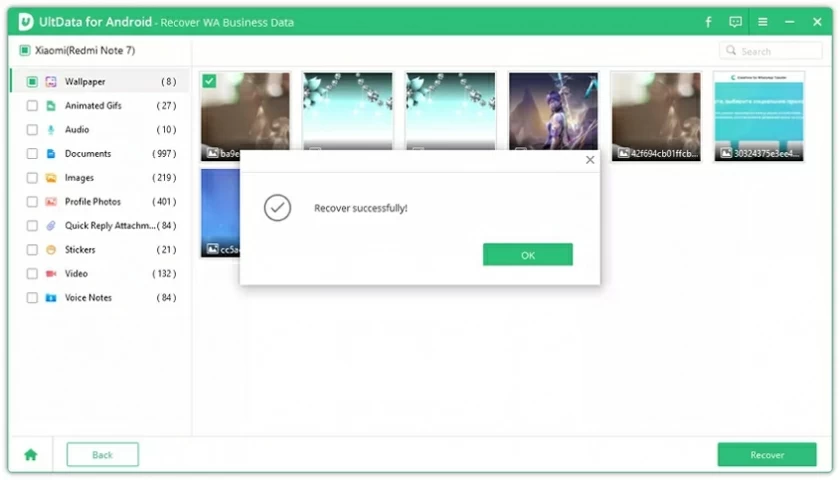
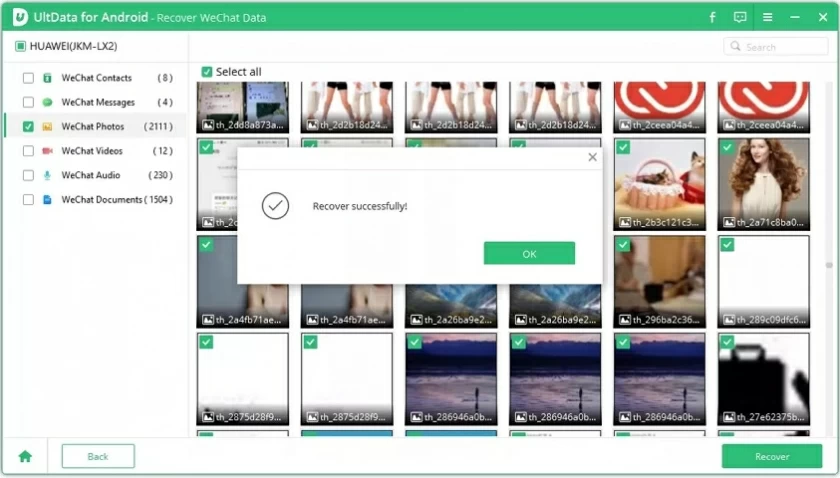
After scanning, all WhatsApp business data will be displayed. Select the data to be restored and click "Restore" to save it to the desired location.
